Sharing files between a Windows Vista Business Edition PC and a Mac running OS X Tiger 10.4
You can use the following procedure to share files between a Windows PC running Windows Vista Business Edition and a Mac running OS X Tiger 10.4
Both computers should have their firewalls turned off, or have the relevant ports opened. These ports are 548, 427 and 139.
Stage 1 Ensure all computers are on the same subnet
Ensure that first each of the computers can access your network. Ensure that the IP address of each computer shares the same subnet, ie 10.0.1.x or 192.168.0.x or whatever!
Stage 2 Usernames and Passwords
It really helps with the Windows PC to have a user account with a username and a password and to know the shortname and password associated with the Mac.
How do I find my Mac (OS X) shortname?
Creating a new user account on Windows Vista
If you want to make it very easy to share both home directories (all files) of both the Mac and the PC, it really helps if the usernames and passwords match on both the PC and the Mac.
If you don't require users to need a password to access the shared folder on the Vista PC then turn off password protected sharing.
Stage 3 Mac File Sharing
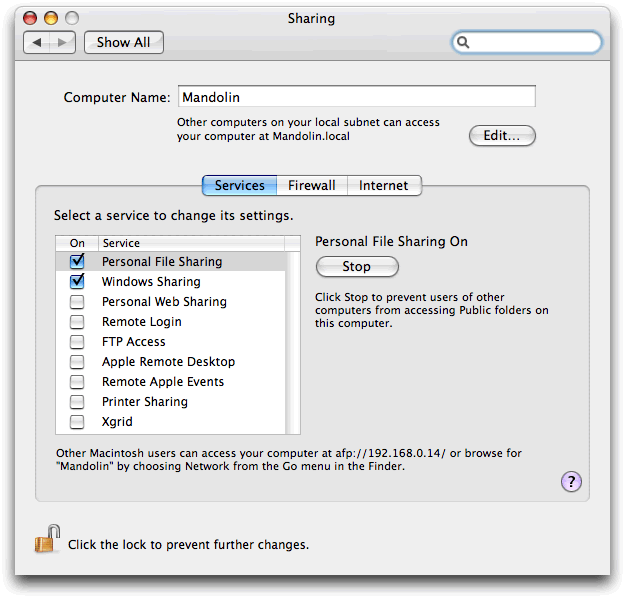
On the Mac
System Preferences -> Sharing
Ensure that Personal File Sharing and Windows File Sharing are checked
Stage 4 PC File Sharing
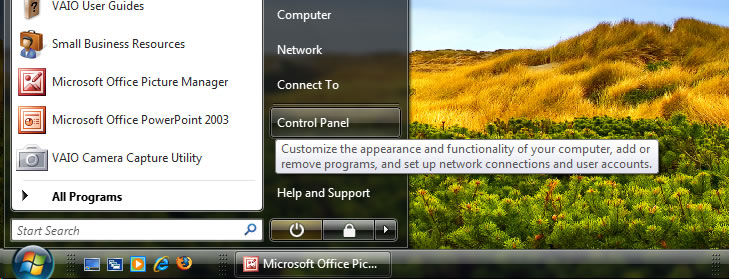
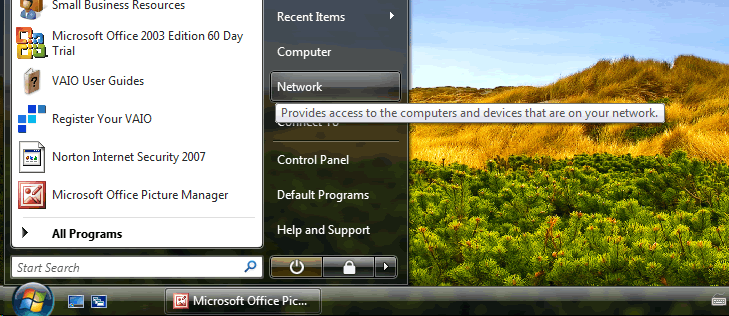
On the Windows PC, Start -> Control Panel
This will bring up the following window.
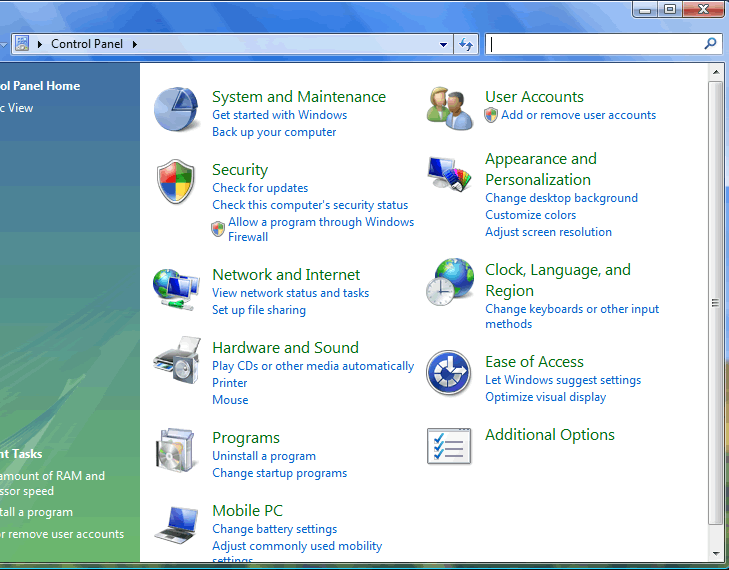
Click on Set up file sharing.

This will bring up the Network and Sharing Centre.
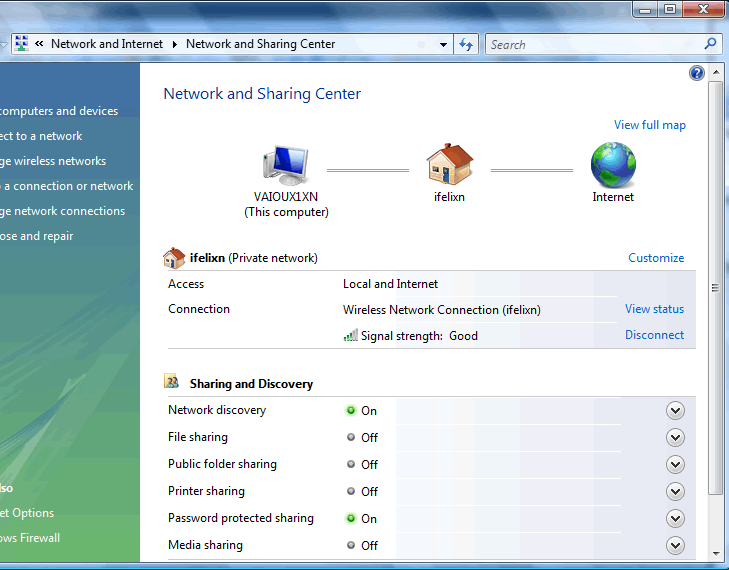
This window should be showing you the network to which the computer is connected (in this example it is my wireless network, felixn, an d that this is a home and private network. These settings were confirmed when I connected the Vista PC to my wireless network.
We are going to share a folder with a specific user, if we want to share files with everyone then it is advised to use and turn on Public folder sharing.
Another option is if you don't require users to need a password to access the shared folder then turn off password protected sharing.
As you can see File sharing is currently Off.

Click the downward arrow on the right to change File sharing from Off to On.
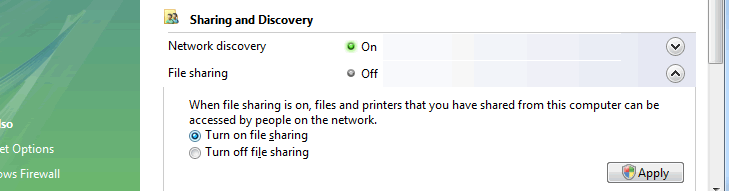
Click the Apply button.
Though you have now turned on file sharing, you now need to identify which folders you wish to share. Use Explorer to navigate to the folder containing the folder you wish to share.
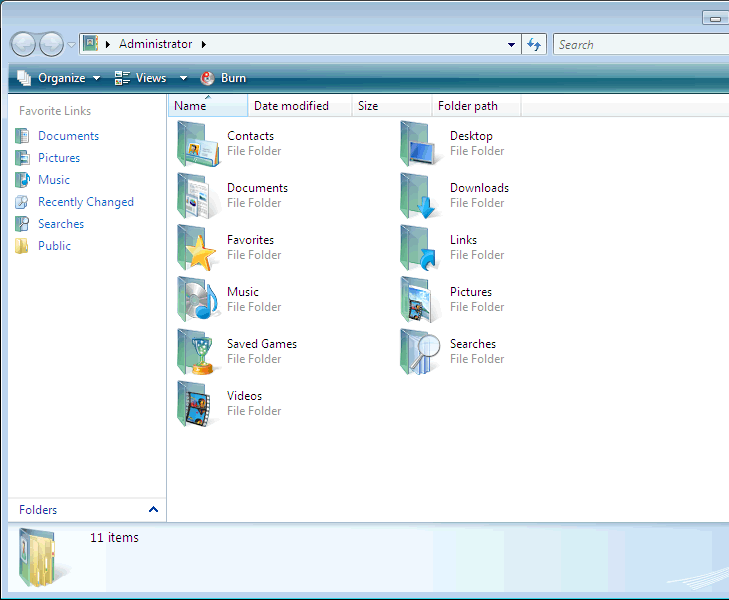
Select the folder you wish to share, a Share icon and menu item will appear.
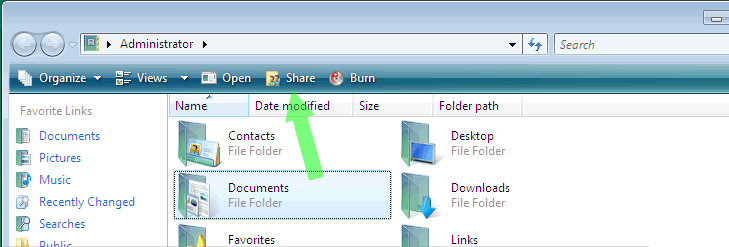
Click the Share menu item, you now be asked to identify who you wish to share the folder with. In this example I am sharing my Documents folder.
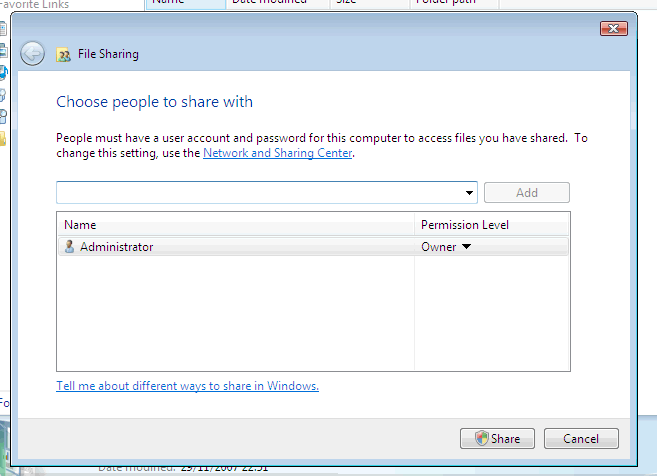
Click the arrow on the drop down box and you will be given a list of users on the Windows Vista PC. In this example I have already created a Windows Vista PC user account which matches my Mac's shortname and password.
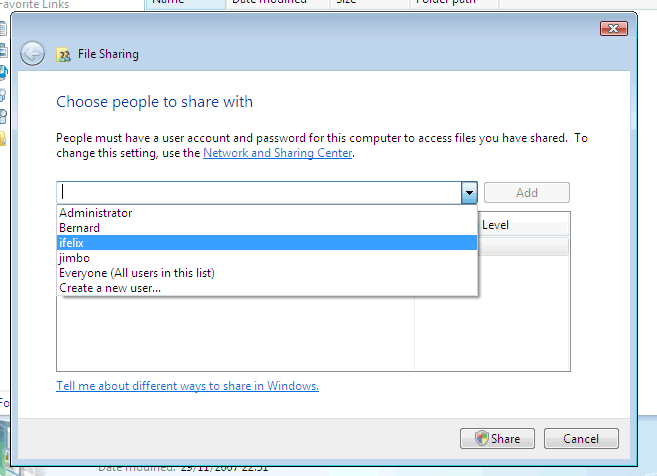
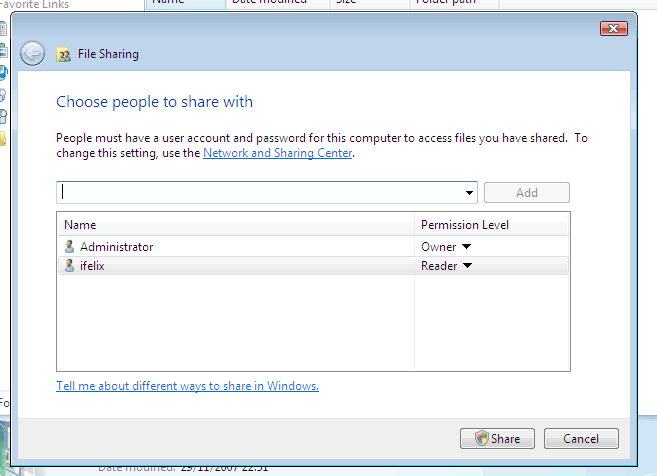
I can now add ifelix to my list of people I wish to share this folder with, I can also set the permission level to allow ifelix just to read the folder or to have read write rights over the folder.
Click the Share button, this brings up the following screen.
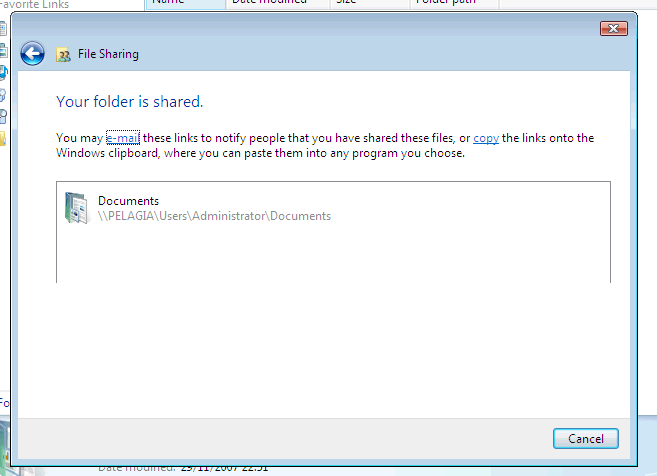
The link indicated in the dialogue only applies to other Windows users and will not work on a Mac.
Stage 5 Mac to PC
On the Mac (running 10.3.2)
Finder -> Go -> Connect to Server

You will now see the Connect To Serve window.
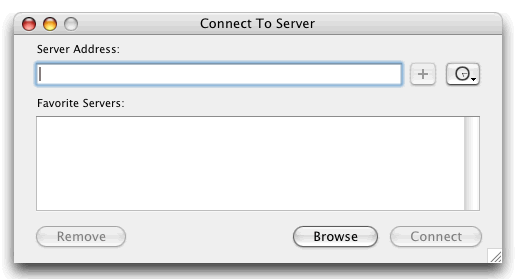
Now you can try entering the Vista PC's name, but generally you will have more success with using the PC's IP address.
How do I find a Vista Business Edition PC's IP address?
Type in smb://IP Address of PC
example smb://192.168.0.34
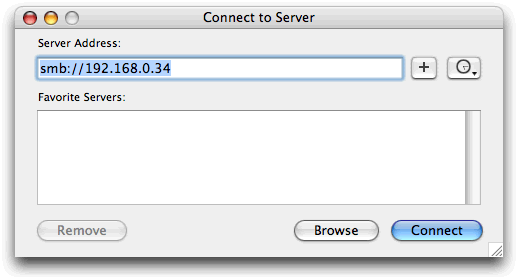
Click the + button for Finder to remember this location.
Click Connect
It will then attempt to connect to the PC

You will then be asked to authenticate. The Mac will put in your Mac shortname and use the default workgroup called Workgroup.
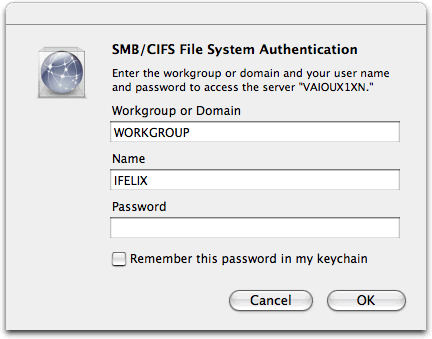
If you have used a different workgroup on your network and/or have a different username and password on the PC then fill in the correct details.
You need to use your Windows username and password, NOT your Mac shortname and password.
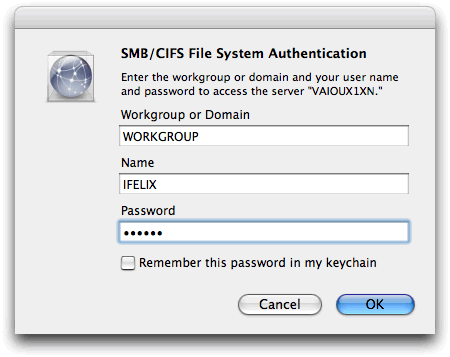
Check the Remember this password in my keychain box to avoid having to enter the password again.

If it is successful you will see the following and will ask you to Select the SMB/CIFS shared volume you want to connect to. Select the Users share and click OK.

Your shared user folder from the PC will then be mounted on the Mac Desktop and will be available in Finder.

If you double click the relevant user folder, in this example ifelix you will then be able to access the documents, pictures from the PC on your Mac.
Stage 6 PC to Mac
On the Windows PC, Start -> Network
This will bring up the following window.
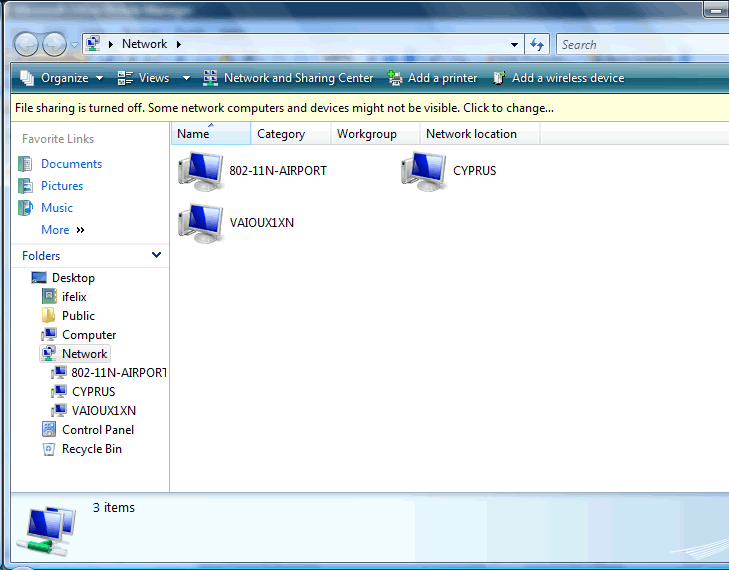
In this window you can see the Vista PC VAIOUX1XN which is the PC you are on! An 802.11n Airport Extreme base station 802-11N-AIRPORT (which has hard drive sharing capability, like a card reader on a printer so it turns up) and the Mac I want to access, which is named CYPRUS.
You may find initially that the Vista PC can only find itself.

If this is the case either wait a minute or two and then click refresh.
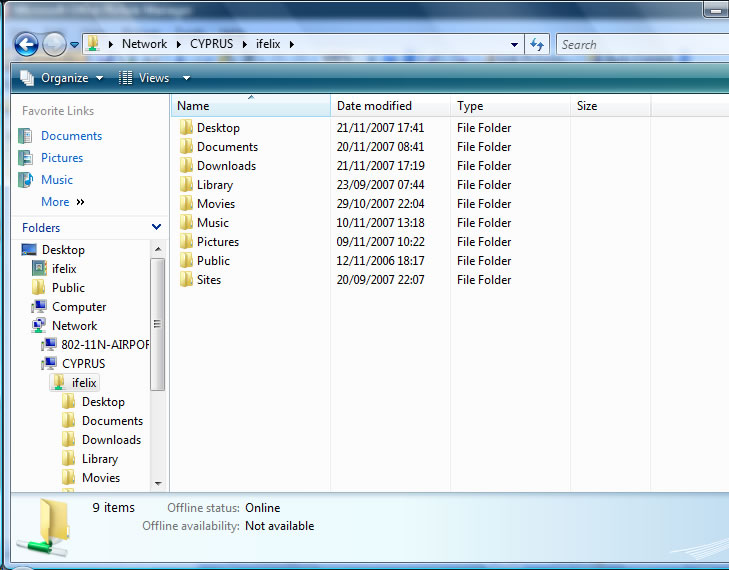
Double click CYPRUS and if you have the same username and password on the PC and the Mac you should now see the following screen.
If you are connecting to a Mac which has a different username (shortname) and password then you will be faced with the following authentication window.

You need to use your Mac shortname and password, NOT your PC username and password.
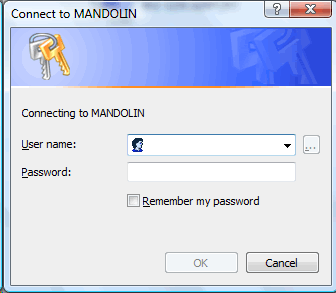
Check Remember my password and (usually) the Vista PC will remember the username and password so you shouldn't need to enter it again.
Once you have this window, you can click the Mac username folder.

This will bring up the Home folder from the Mac.